|
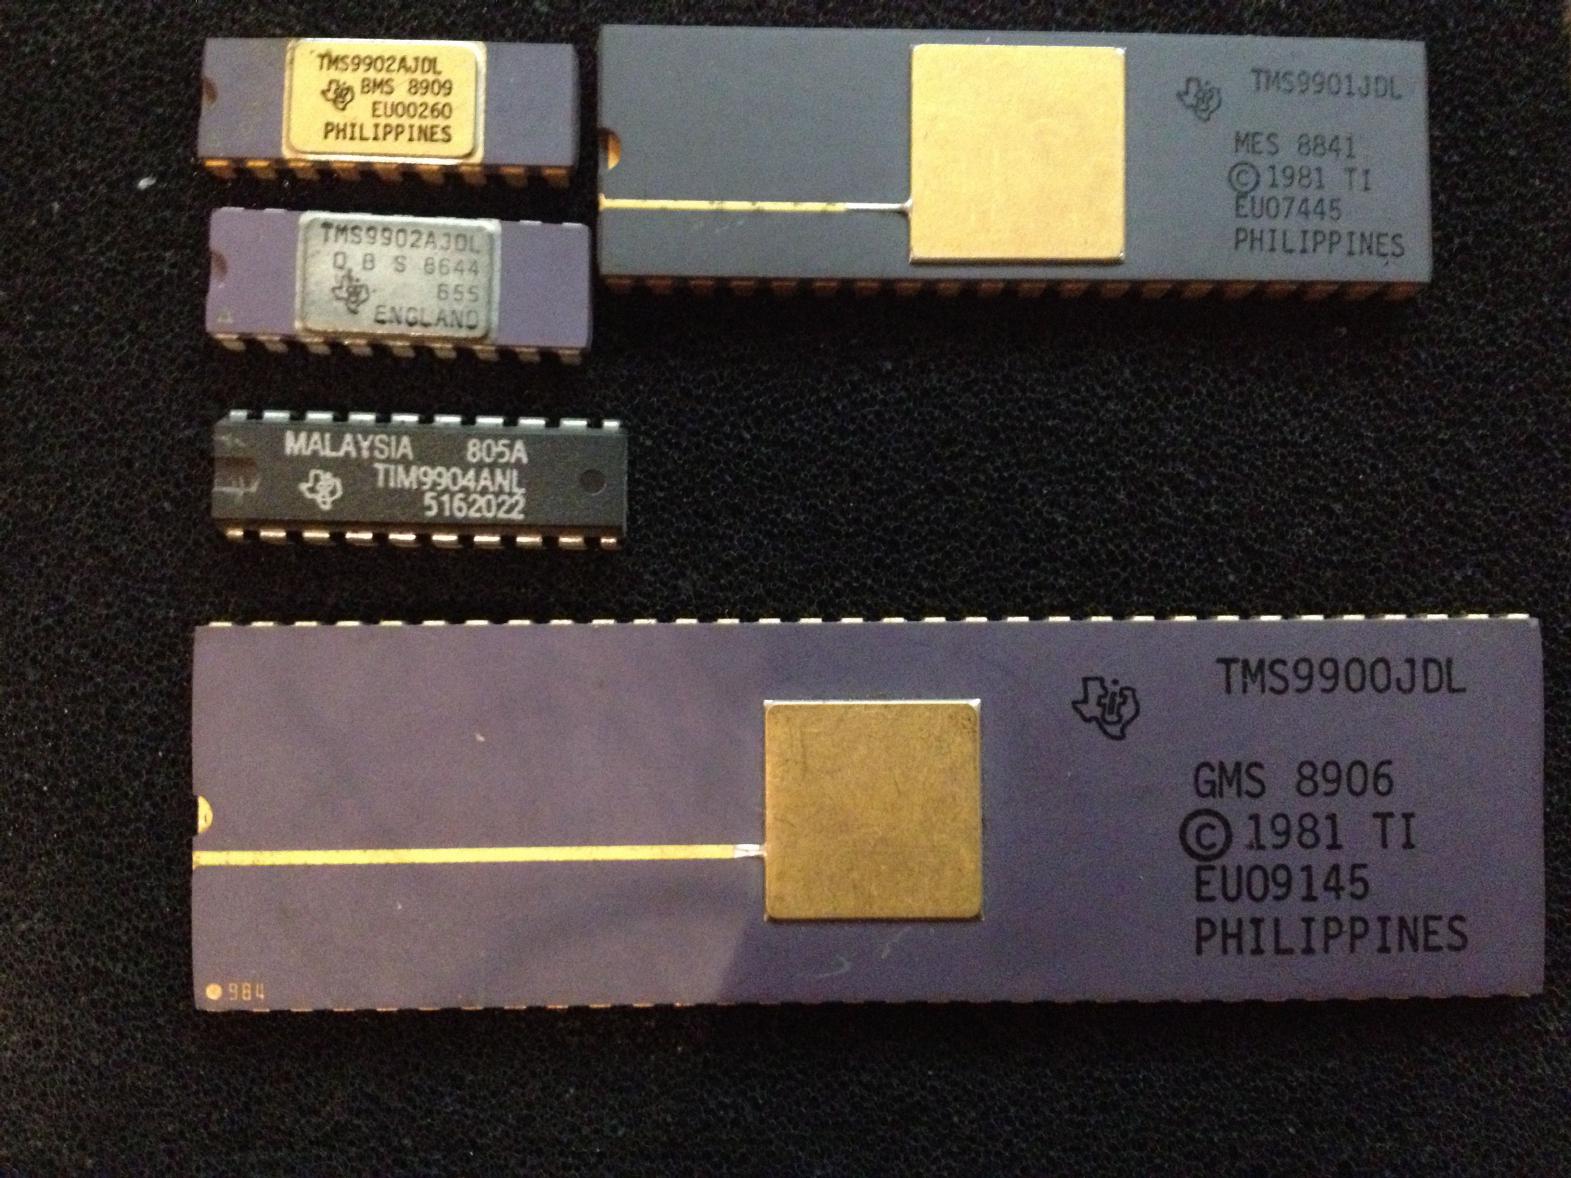
In Oktober 2013 I got a lot of boards from historic computers for the collection as well as box of processor chip ranging from classic Intel processors over members of the MC68k family to Texas Instrument's TMS9900 processor series which originated in the 1970s. The picture on the left shows some of these chips - since I always want to see computers running, I decided that I should learn more about this particular processor family and design a small computer around it so that I would finally have the necessary hardware to write a monitor and maybe a simple Forth interpreter for. |
|
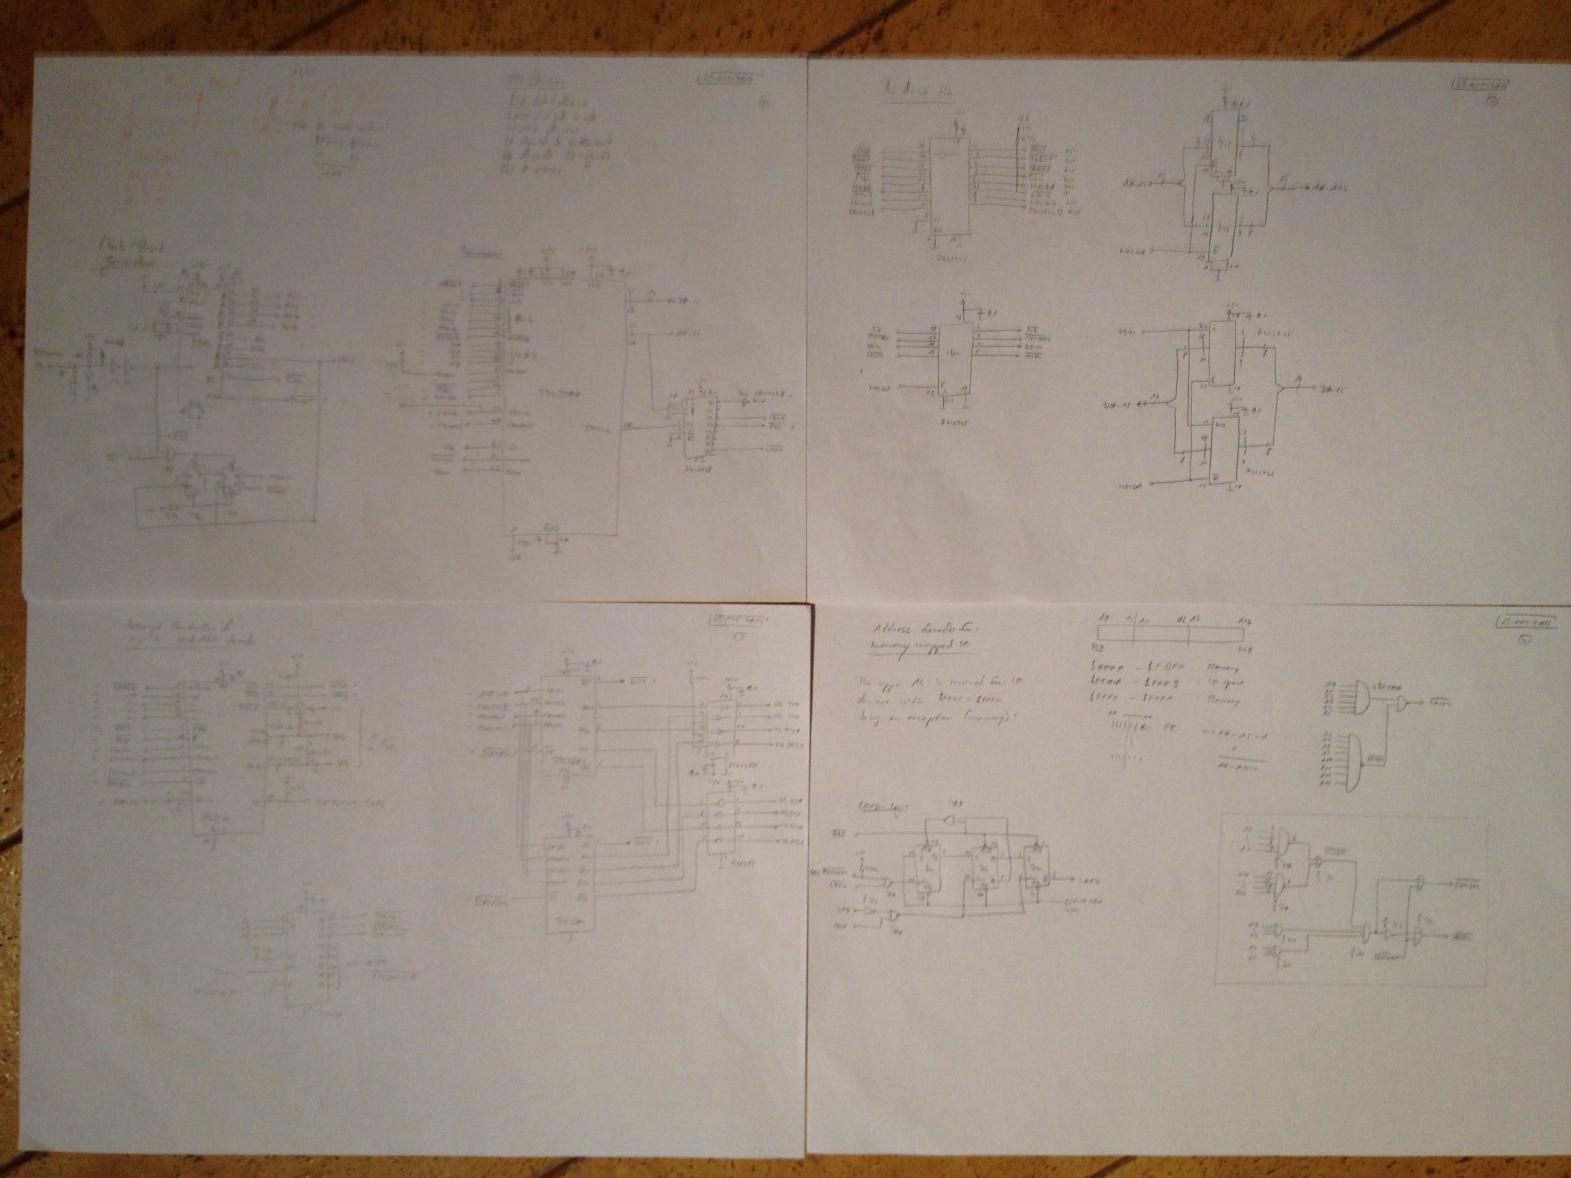
So I started to read the various documentation which is available at the bitsaver's archive. I have to admit that it took some time until I really understood the necessary external logic required to make a TMS9900 CPU feel cozy and at home. The picture on the right shows the first (and as of now, 06-NOV-2013, only) set of schematics for a TMS9900 based CPU board with the necessary bus drivers, restart/load logic, address decoding for CRU devices and memory mapped IO etc. All in all it would require more than 20 integrated circuits which is too much for a Euro card measuring 100 mm times 160 mm. In addition to that I have not enough spare time to go through the laborious process of building such a large circuit in the forseeable future, so I decided to take a different approach. |
|
| Starting small | |
|
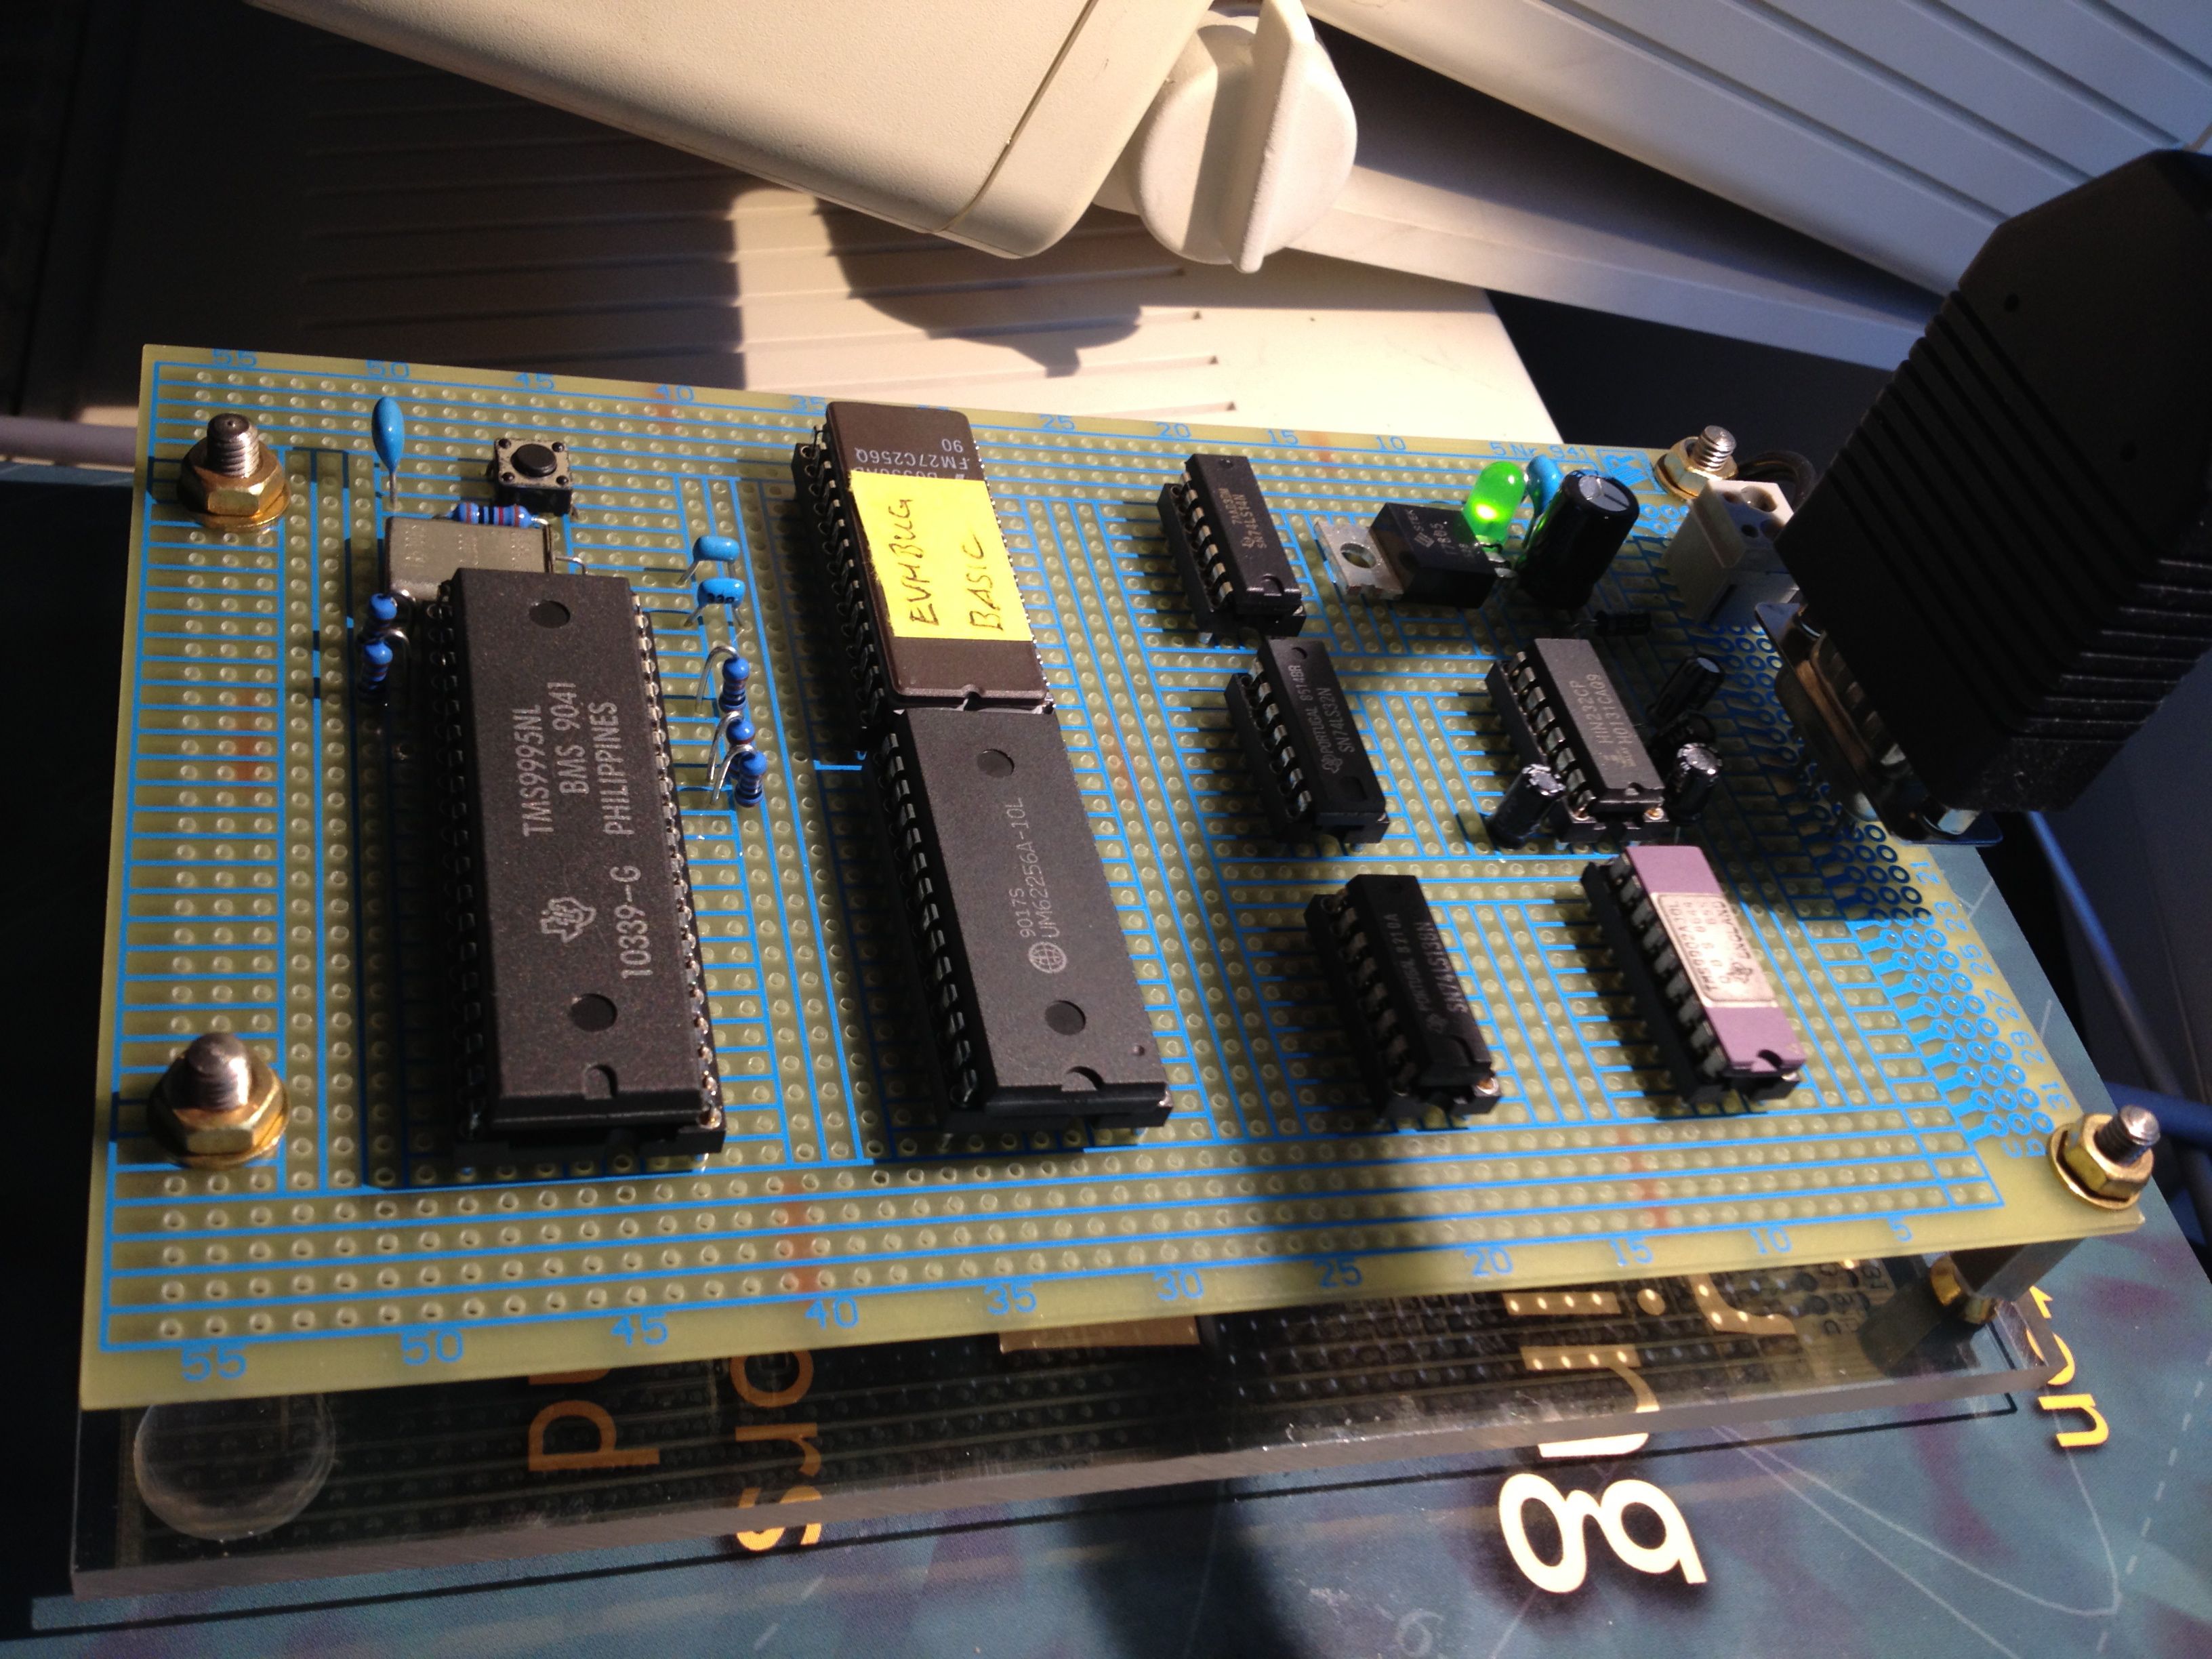
I found Stuart Conner's wonderful web page describing a very simplistic single board computer based on the TMS9995 chip which essentially implements the TMS9900 architecture but features a simple 8 bit databus for external devices, thus simplifying the setup considerably. The picture on the left shows my implementation of Stuart's design using wire wrap technology (I am always looking for wire wrap sockets, if you have some you don't need, please let me know!). On the left, the TMS9995 CPU chip can be seen. Next to it are 32 kB of RAM and 32 kB of EPROM followed by some simple address decoding logic and a serial line interface based on a TMS9902 chip with a MAX232 line driver. |
|
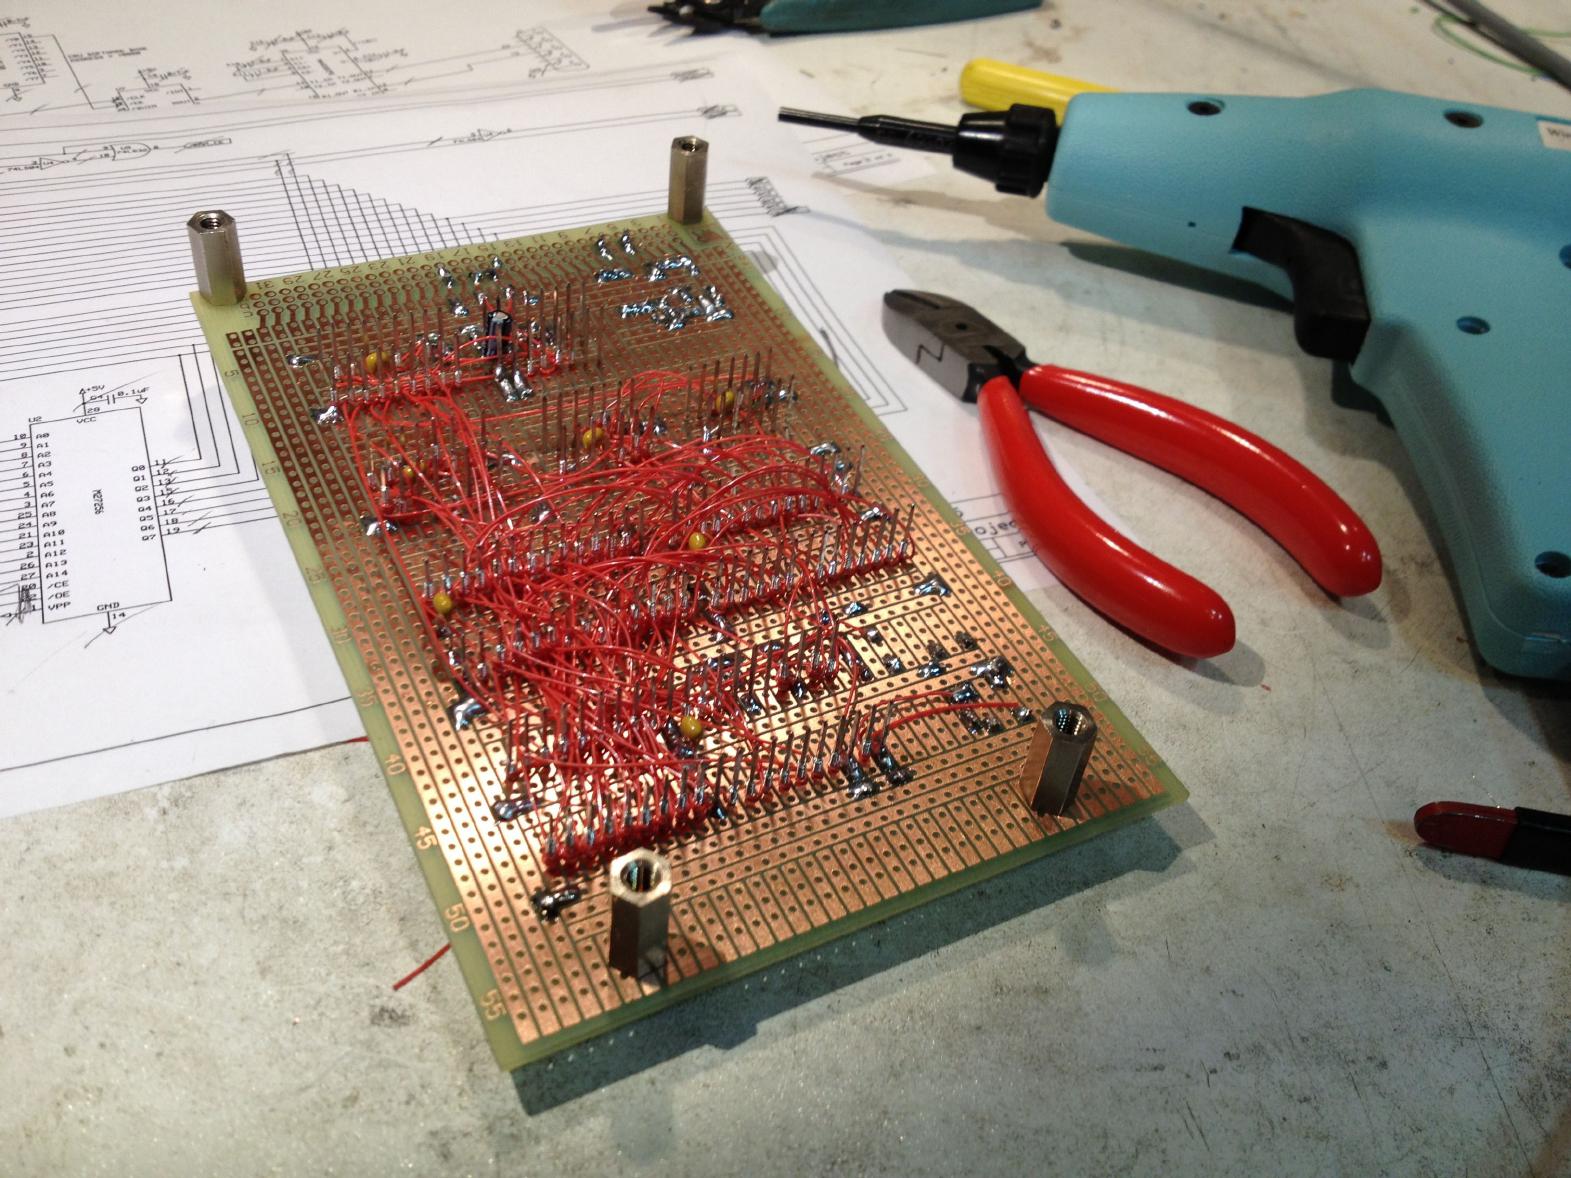
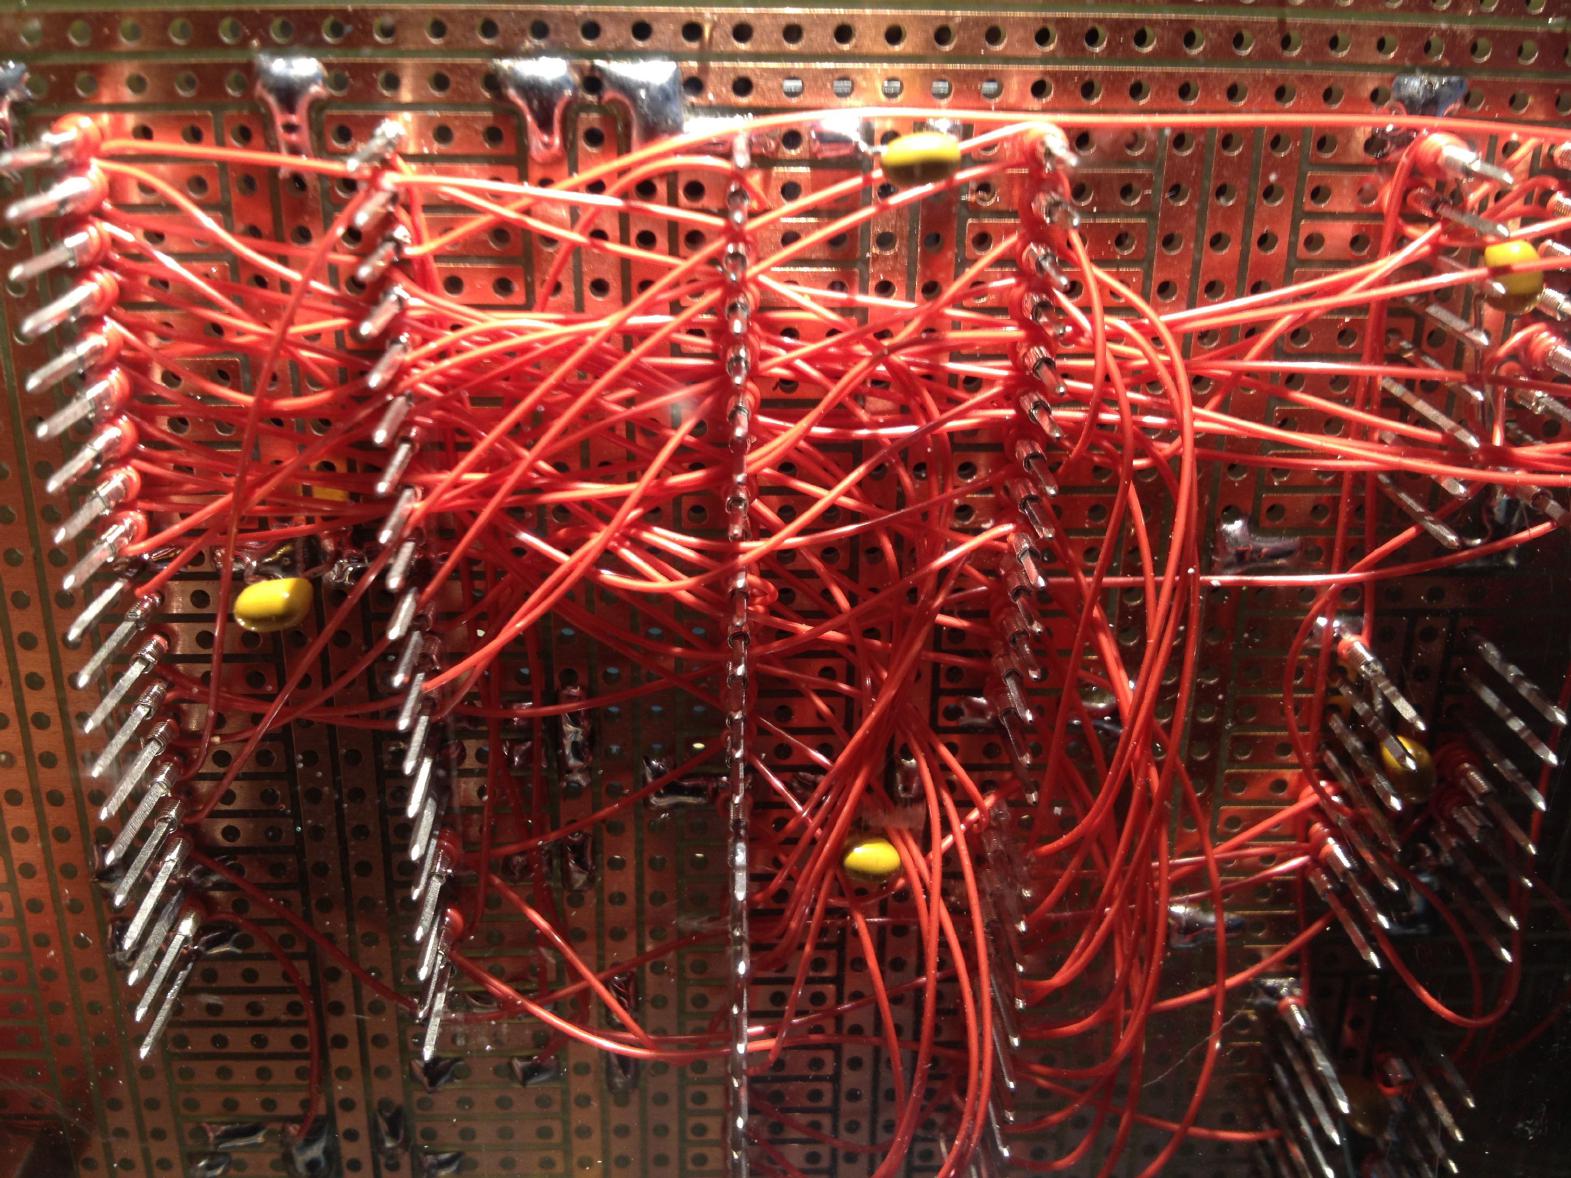
I, personally, prefer wire wrapping over traditional solder connections (the main reason is, of course, that I built my first wire wrapped circuits back in school when we had to participate in a practical project which I did at a local company which build specialized electronics - there I learned wire wrapping). I am faster with a good wire wrap tool than with a soldering iron since the wire wrap gun takes care of skinning the wire and establishing the connection in a single step. The picture on the right shows the (nearly) completed board with the red wire interconnecting the various chips. The blue device on the right is my trusty wire wrap gun. The four distance pieces are necessary to mount the board on a piece of Plexiglas, so that I can place it on the desk without the fear of bending pins. |
|
|
The picture on the left shows a detailed view of the back of the small CPU board. Clearly visible are the long pins of the wire wrap sockets around which the wires are wrapped (three to four connections per pin a possible). Please note that each chip has a dedicated 100 nF capacitor connected between its supply voltage pins. These are mounted on the back due to simplicity and short wire lengths. |
| Starting small | |
|
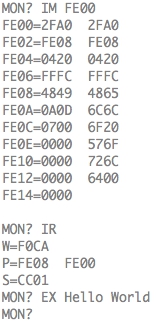
Stuart Conner has some EPROM images for downlaod on his page describing his small TMS9995 breadboard computer. Two of these EPROMs contain the EVMBUG monitor (which is quite similar to the monitor used in the TI development board for the TMS9900 processor) in conjunction with a BASIC respectively a Forth interpreter.
The picture on the right shows my first machine language program
entered via the EVMBUG monitor. The
The first instruction, namely
The next instruction,
Terminating the |
|
|
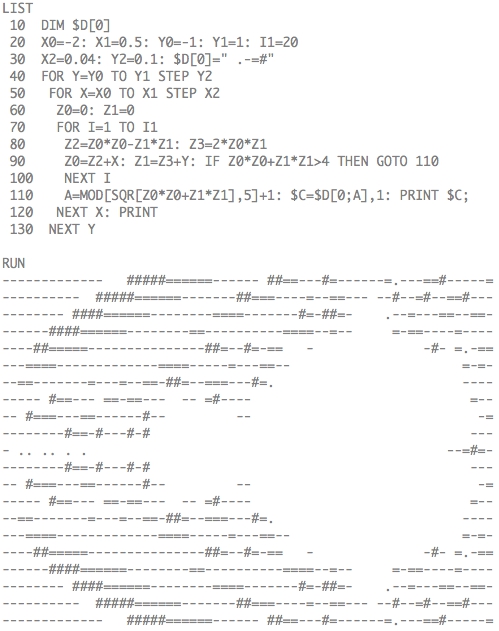
The picture on the left shows a small CORTEX-BASIC program together with its output generated on this TMS9995 single board computer. It generates a picture of the Mandelbrot set (lacking any graphics devices a simple ASCII represenation must suffice). CORTEC-BASIC is a bit strange at first sight but rather powerful. It is contained in one of Stuart Conner's EPROM images. It is not too usable, though, since the original CORTEX-BASIC interpreter was designed to run in RAM rather than in ROM, so it is copied from EPROM to RAM leaving only a bit more than 3 kB of free space for BASIC programs. Nevertheless it is a nice toy to do something with this small computer. |
| Writing an assembler | |
|
Now that I have my first simple TMS9995 computer, I want to do something
more elaborate than printing This is, where this story currently ends - the assembler is taking shape. As of 06-NOV-2013 (after working 14 hours on it) it can handle about 80% of the TMS99xx instruction formats, can work with labels etc. As soon as there is more to write, this page will be extended. The current state of the assembler may be downloaded from here. |